


is there anyway to still get this design? i just purchased stitch artist L3 and found your daily learning program i'd like to examine this design and learn
01/23/24 01:03 pm MST
Please Login to comment on this post.


 StitchArtist Level 3 preview!
 Community & Education / StitchArtist Student Gallery
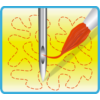 StitchArtist
Do you have a question or comments about StitchArtist? Post them here. Do you have answers or follow-ups to questions you see? Post them, too. Thank you for your participation.

is there anyway to still get this design? i just purchased stitch artist L3 and found your daily learning program i'd like to examine this design and learn

Hi Kathy, This design was available only during 2022. We have a new On the House series this year though:
https://embroidery.com/Dime-OnHouse-WeeklyFreeDEsi...
Hi there, I'm having an issue with Stitch Artist and I hope someone can help me out. I designed a cute eye and for some reason during the stitching the machine kept returning to this one spot and just layering and layering thread over and over again. I now have a crappy looking eye with a bulbus (about the size of a pea) spot of black thread on it. On the program the eye looked fine, so how do I change/prevent the machine from re-going over the same spot repeatedly? I have Stitch Artist 2 if that helps.
Hi Laura, with weird results like what you describe, I'd suggest checking the points. If you have a lot of stitch points (nodes) in the shape, that can cause trouble in stitching. And I suggest using stitch simulator to see how it will stitch before going to the machine.
Hi Kirsten, thanks so much for the fast reply, I really appreciate it! As of now I don't know how to edit the stitch nodes, I can easily edit the nodes that create the shape, but not where the actual thread goes. The problem seems to have come from me using the "look for holes" option during the selection process. It went around the "shine" of the eye and when it starts stitching it just circles that area repeatedly. I'm trying it now where I just sew with a solid color then use the "remove hidden stitches on save" feature in preferences but it doesn't seem to work, it's still sewing behind that white "shine". I'm trying it anyways because I want to see if the design works out with just sewing the white shine on top of the solid black, but I'd prefer to not have to do that in the future. I Googled the remove hidden stitches and it looks like there's a button with red scissors that does it, but Stitch Artist 2 doesn't seem to have that feature. Would I need to upgrade to 3 in order for remove hidden stitches to work properly?
Hi Laura
I think shape creation nodes are what I meant, since stitches are created in reference to those. Remove Hidden Stitches only works when you are using two different designs. It won't remove overlaps in the same design. So you would have to make one of your elements into a new design in order to use it for this. It works the same in SA3 as in SA2; upgrading won't change it. Since you don't have that button, I would guess you don't have Essentials. Remove Hidden Stitches comes with Essentials, and isn't a feature of StitchArtist. In StitchArtist, the general rule is that if you want a place to not have stitches, you start by not placing stitches there. To begin this again, I think I'd draw with points and use the curved option to make a circle, then click "add a hole" and make the shape for the hole, and then add stitches to the resulting "donut". Then I'd make the shape of the shine and place that over the hole.
Also, depending on the size of your eye, it is actually very common for people to do as you said, and just stitch the white shine on top of solid black. In small areas it's rarely worth it to cut out the stitches behind a small overlap.
There's a Facebook Group you could post your question to if you like: https://www.facebook.com/groups/605510109592554
Okay I'll look for "shape creation nodes" somewhere in the program and see if I can edit those :) thank you :)
As for the overlap, I went ahead and split up my shapes and added a new design, but the stitch preview still shows stitching go under the shapes even though I have "remove overlaps when saving stitch files" checked off in preferences. Do I just trust it and try embroidering anyways, or?
Also, thanks for the link but I don't actually have a Facebook :)
Laura, you know the part where you draw with points? Those are the nodes I'm talking about -- the points. If there are too many or in a funny order (like if you used the magic wand to create the shape), that can cause issues, and removing all of the unnecessary points can solve issues.
With Remove Hidden Stitches, you won't see the results in your working file, only in your stitch file. So if you save to PES format, for example, you should be able to open the PES format and view it and see that the stitches have been removed. But in your working file, there won't be any change.
Hi,
I've been educating myself with Stitch Artist 1 & Merrowly Patch. Wow! Love the programs and I am learning a lot with the help of your classes, etc.; however, I have one problem that I can't solve on my own.
When importing scanned artwork (jpeg file) from my printer to a computer file, and then importing to the Stitch Artist, I also get the background page (clean, letter-size paper) that the artwork is on. How do I get rid of the scanned paper and just have the artwork image alone that I want to digitize?
Thank you, Janet
Hi Janet,
Sometimes on a scanner itself, you can select just the part of the paper that has your picture on it. You will still get a rectangular are of the paper, but at least it won't be the entire paper.
Or, once you have it scanned, use graphc software to edit and crop the image. In Windows I use Paint 3d for this.
Some software makes it easier than others to remove the entire background, and most can at least let you crop away the bulk of the unneeded area.
Thank you for the prompt reply and I will try the Paint 3D.
How do I reduce the stitch count? I only have level 1. The circular areas in the center and the white spot in the red are multiple layers. is there a way in level 1 to make it one layer?
Hi Gina, if you digitized this yourself, yes, you can open the .be file and remove or re-shape the areas where you want a lower stitch count, and you can do this in SA1.
If it is not a .be file, the product to use would be Density Repair Kit, which is not included in Stitch Artist.
hi , I m a newbie and I hv stitch artist 2 . I love the program so far but my only issue is when I take the design and sew it using my brother machine it takes about 45 mins to sew it where as similar designs I purchased online may take 15 mins , wonder if there is a tip that can help . Same way as zipping a file for example .
Hi.Jamiela,
Fascinating! I suggest that you open a digitized design that you bought, either in software or on the machine, and really intentionally watch how it works. See if there are differences between the patching, stitch type, or angle that the designer chose, and what you would do on a similar design. I have heard digitizers say this is how they I.
improve their craft.


Thanks for the positive feedback, Roman.
Anyone interested in using StitchArtist to make puffy foam designs: John Deer's Embroidery Legacy is having a webinar this Saturday on puffy foam. You don't need software to participate, but if you have StitchArtist, you can learn John's techniques and apply them in SA. John will do his demonstrations in Hatch software, fyi, so it won't look exactly the same, but you will be able to find comparable tools in your StitchArtist program. It's just $24.95 for the 90 minute lecture-based webinar. Here's the link with more information and registration: https://www.digitizingmadeeasy.com/embroidery-digi...
I’m having an on going issue when I create an in the hoop design. The first step is a placement stitch for the overall design (a stuffed animal for example). Everything seems fine until I save the design and then the first stitch color which is the placement stitch for the object is missing stitches unevenly all the way around. Before I save it I run the stitch simulator and all of the stitches are there. As soon as I save it the stitches are hit and miss all the way around. This is so frustrating. Any help is greatly appreciated, I now own all three levels of stitch artist and this has happened at all levels
Here's an in the hopes that I did, where it remove hidden stitches was removing my placement line because the satin Stitch was covering it.
Don't Remove Hidden Stitches
https://www.google.com/url?sa=t&source=web&rct=j&u...
Hi! This sounds frustrating for sure. I have one thought, do you also have Essentials?
Essentials has a remove hidden stitches feature which activates when it appears that two separate designs are overlapping. It removes the stitches that you don't see in favor of the ones that you do. This ordinarily helps with density, but can get in the way when you're doing appliques or in the hoop designs.
Can you import Silhouette SVG files into Stitch Artist for digitizing?

Yes you can easily import .SVG art for the digitizing method.

Yes, you can import .SVG art starting at Stitch Artist Level 2 (not available for Level 1). Thanks for the question, Cauleen.
~Heather
[email protected].
Hi,
I'm new to Stitch Artist and am having a problem with combining holes. I can successfully cut the selected area out, but when I go to stitch it out, the background stitch is all over the place, repeatedly stitching around the outline of the hole area and jumping to a new area of the design for a few stitches only to go back to that outlined area of the hole. Hope that makes sense. Would you happen to know what I'm doing wrong?
Thank you!
Hi Teri, Did you figure this out? I'm having a similar problem - filling the holes, some of the outlines are not stitched, going all over the place... I've watched Lisa's video and following step by step but end up with this.
 09/12/21 05:05 pm MST
Hi Peggy,
Maybe you could try again to share a picture of what you are encountering. Every project is different and has different needs.
Generally speaking though, pay attention to the kinds of nodes that you have and remove any extra points.
Hi Teri,
I hope others can jump in, as I don't work with StitchArtist regularly. There is also a great StitchArtist group on Facebook that you can check with.
https://www.facebook.com/groups/605510109592554
I can suggest that you look at the remaining area and work on the start and end points, and remove any extra nodes. What I remember from going through the course is that having extra nodes can create strange, scattered results.
Thanks so much, Kirsten. I've joined the Facebook group you have recommended and am working on my nodes and start and end points now. Hopefully I can figure out what I've done wrong with your suggestions.

why i cant see the object window and prefeience or properties window at the same time?
Hi Lacey, I think you can.
In the View menu, choose Manage Views, then "reset views"
hi Kristen can you buy level 2 of stitch artist without buying level 1 since level 2 has alot of level 1 in it?
Hi,Lacey
Yes, you can! In fact, if you know you want level 2, that's what I would recommend. Level 2 includes all of level 1.
If you were to buy level 1 first, and then level two, what you should pay would be the same as if you only bought Level 2.
Thank you so much, Kirsten. I sent both the .be and .vip files.
I think after next week I should have more time to concentrate on the lessons
Hi Eric,
Thanks for posting here so we can all learn together. I'm not able to see the rest of this conversation at the moment. Forgive me if my guess at the context is incorrect. I think maybe we are talking about sending a design to the machine?
When you send a design to the machine, you'll want to send the stitch format. Of the two you listed, that's the .vip.
When you are making edits and changes, you will always want to use the .be file.
If it ever happens that you have a .be that you can't edit the way you expect, this is caused by accidentally starting with a stitch file, and saving that as .be. To be able to edit fully, you'll need to begin with a .be that began as a .be.
I drew out an rectangle in Stitch Artist 1 and wanted to open one area. I click on one node and then hold shift key to click on second node but not keeping both nodes highlighted. Read in manual where you can click one node and cause a break. So click on one node and left click to get menu ..I don't have "Break at point" as a choice. Menu has Curved-Cusp-LIne- Symmetic-Copy. Manual says there should be Break at point and Reveal in Object View. I have the 1.164 download
Hi Debbie,
Rather than shift, to keep both nodes highlighted, hold "control" to click on the second node to keep both highlighted. Then use the right-click, and you'll have "Break across points" as an option, and you can cause a break.
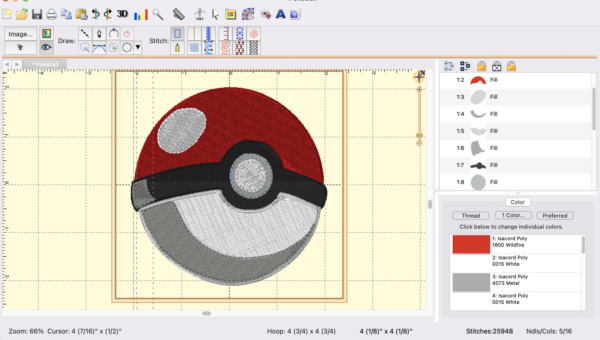
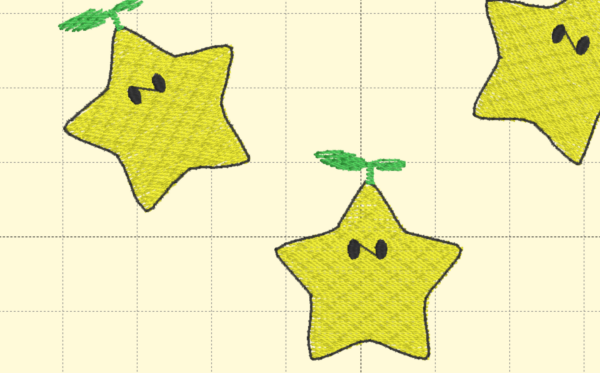
Hey so I'm making a design with rly tiny eyes, those star's are like an inch by an inch. When I actually go through with the embroidery, it makes really big knots on the other side of the shirt, like on the stabilizer side. Because the eyes are so tiny i did manually placed stitches, I showed how i did the stitches in the second screenshot.
How should I go about this better? Less Density, is there a type of fill i should learn how to do with manual place stitching that works well in situations like this? If so, what is it.
Hi there,
I think I'd use a satin column on those eyes. I also think you are right that less density would likely help.
If you haven't already, perhaps you would like to take our free StitchArtist class? The sign up link and information is here: https://embroidery.com/learn-stitchartist.ec
Hello, Kirsten. I am working through the instructional emails for Stitch Artist. The last 2 videos on Day 3 won’t open. When YouTube opens after I click the icon, the message is that the videos are private. Any suggestions? Thank you
Kelly Stodola of Thatssokelly has graciously made her videos available to our group again. Those video links are now working!
Hi Beth,
Thanks for your question. Some of the videos in the series have been moved as the owner is updating her YouTube presence. If they become available again, I'll be sure to let you know. These were some of my favorite homework.
Hello to all,
I have stitch Artist level 1, and I would like to split a design. I have a heart shape applique, which I would like to split in half and add some lettering. I am adding two points on the line, select the points, and then choose 'break at points' but nothing happens!!! What am I doing wrong? Is it possible to split designs in level 1? Thank you in advance
Hi Claudette,
You are right that you should be able to do splitting a design in StitchArtist 1 if you created the design and are working with an original .be file -- the "working" file.
If you are working with with a stitch file -- like .pes or .hus or something like that, you cannot split it in StitchArtist. If you have Essentials or Enthusiast, there are tools you can use to split the design with. Enthusiast would make it easiest, with its lasso tool.
It sounds to me as if you might be working with a pre-created file in a stitch format. Please post back with your results.
But since you are splitting a heart, even if you are in the .be working file, there could be something we're missing. What sort of object is the heart? Is it a filled heart, or is it an outline done in a satin stitch?
I need a clean and readable 1/4 inch BX font. Can anyone make suggestions? It is for a polo.
Hi, Bonnie. About the smallest fonts we carry at Embroidery.com are the Dot Font and Jester Font from Cactus Punch. They are both available in BX format. Here are links, if you'd like to take a look:
Dot Font:
https://www.embroidery.com/product.ec?productsetID=10661&efid=4636&page=1
Jester Font:
https://www.embroidery.com/product.ec?productsetID=4246&efid=4636&page=2
~Heather
[email protected]

I'm not sure if this is the right place to ask, but here goes.
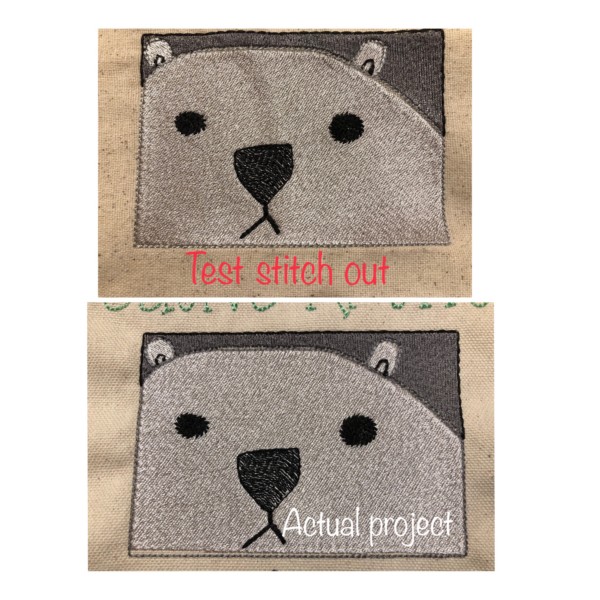
I digitized some of my grandkids artwork and this particular project has given me a problem in the final stitch out. The test stitch out came out perfect, but when I stitched it out on the actual project the fill stitch pulled the project out of line on both the face and the background. My stitch settings didn’t change from the test to actual project. I realize I don't really understand what all the setting are, and that they have defaults so I tried not to adjust anything if I didn't understand it's particular job in the system.
The project fabric is duck cloth and I used polymesh cutaway stabilizer, the only cutaway I have on hand. The test is a mid weight muslin and I used medium tear away stabilizer for it.
I know there can be a difference between the fabrics that can play a role in the stitch out, so I am asking if just changing the stabilizer will make it stitch out right or should I do something to affect the pull compensation with the heavier fabric such as the duck cloth.
I looked at the project advisor and it said that duck cloth doesn't require a lot of stabilizer because it is a fairly stable fabric, so I thought I would be okay with the no-show polymesh.
I have had suggestions to double the polymesh and lay them perpendicular to account for stretch(?) and to add a layer of mid weight tear away. Another suggestion was that the direction of the stitching would cause it to pull. I adjusted the slant and the stitching went from stitching toward the middle with a straight line to stitching from the bottom right corner to the upper left corner. Someone suggested that this would make it want to pull and leave a gap in the lower left corner.
The adjustments I did make in the fill properties was the density of the pattern to a 4.5pt. The pattern is set on wicker, length is 4.5mm, edge path is .4mm and reverse is set to Pattern. I didn't change anything in the pull compensation panel. On the underlay I changed the density to 40 and the inset to 9, contour and perpendicular are checked. Maybe this is where I messed up. I felt like the underlay was way to close and building a very thick base for the fill stitch. I had another piece of artwork digitized by a digitizer and her underlay was about the same density as the 40 pt, so I thought I would try and match it. It seemed to work well with the muslin and the tear away stabilizer. So I wonder if using heavier or a thicker layer of stabilizer would make a difference, or did I make wrong adjustments to the setting?
I am attaching a photo of both the test and the project. And a screenshot of the actual full project The rest is stitching out just fine. Just an issue with he bear. Any suggestions before I attempt another stitch out would be appreciated. Thank you in advance.
Nancy Petersen
Hi Nancy,
I commend you for trying out settings similar to ones in a purchased pattern -- that's a great way to learn! Have a second look at that one and see if you can find differences between yours and hers. For instance, do the fills go the same direction? And were they digitized for the same type of project and fabric application?
The suggestions you have received about fill direction and stabilizing are all good. It is true that stitch direction makes a difference in pull, and cross layering the polymesh is also a brilliant suggestion.
Particularly because your muslin version is stitching out as you like it, I suggest using the same stabilizer for your duck cloth as you did for the muslin. The medium weight tearaway should work well with duck cloth.
Underlay is what supports the stitches and helps keep gaps from appearing. If you find that switching the stabilizer to the coarse tearaway does not help, I suggest increasing the underlay.
Great work! Thanks for posting to the forum. It helps us all.
Hi Everyone! I've had a few people ask how they can save the Let's Learn Together emails for future reference. I've just made an FAQ teaching how to do it in Windows. I hope it helps someone.
https://www.embroidery.com/help.ec?docID=3368&efid...
from:
https://www.intowindows.com/how-to-save-emails-as-...
with modifications and original images.
How To Save Emails As PDFs In Windows 10
Last Updated on August 22, 2017
Windows 10 Mail, Outlook 2016/2013, Windows Live Mail, and Mozilla Thunderbird are some of the very popular email clients out there for Windows 10.
Many PC users often want to save important emails onto their PCs to keep a backup of emails with crucial information. While programs like Outlook 2016 offers options to save emails as PDFs from within its interface, most of the email clients don't come with an option to save emails as PDFs, but there is still a way to do it!
If you are on Windows 10 and using Windows 10 Mail, Outlook, Thunderbird, Windows Live Mail or any other email client or app, including web-based email services like Hotmail or Gmail, you can use the built-in Print to PDF feature to save emails as PDFs in Windows 10 without having to install additional software or plugins.
Complete the given below directions to save emails as PDFs in Windows 10. The pictures shown here are using Gmail in Mozilla Firefox as an example.
NOTE: I have used Gmail opened inMozilla Firefox in this guide. However, you can use the same procedure to save emails as PDFs in Windows 10 from any program such as Outlook 2016/2013, Mozilla Thunderbird, Windows Live Mail, or any app.
Step 1: Start your email client. Open the email message that you want to save as PDF. I am saving Let's Learn Essentials: Lesson 2.
Step 2: Simultaneously press Ctrl and P keys to open the Print dialog. If your email client is a desktop program, you will see a classic Print dialog or program’s own print dialog but there will an option to choose your printer.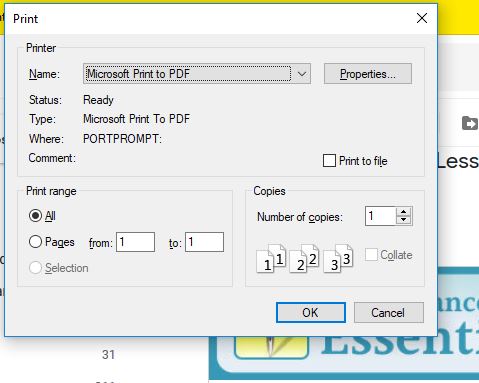
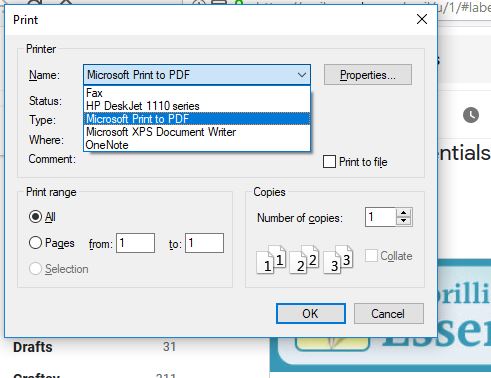
Step 3: In the Printer section, the first box shows you where the computer is going to print to. You can click the little arrow to the right of that to change the print location. Microsoft Print to PDF should be an option. Select Microsoft Print to PDF. Click the Print button.
Step 4: Clicking the Print button will open Save Print Output As dialog. Enter a name for the email that you are saving as PDF, select a location to save the PDF (your documents folder, or your desktop, or wherever you want to keep this email), and then click the Save button to save your email as PDF. Simple as that!
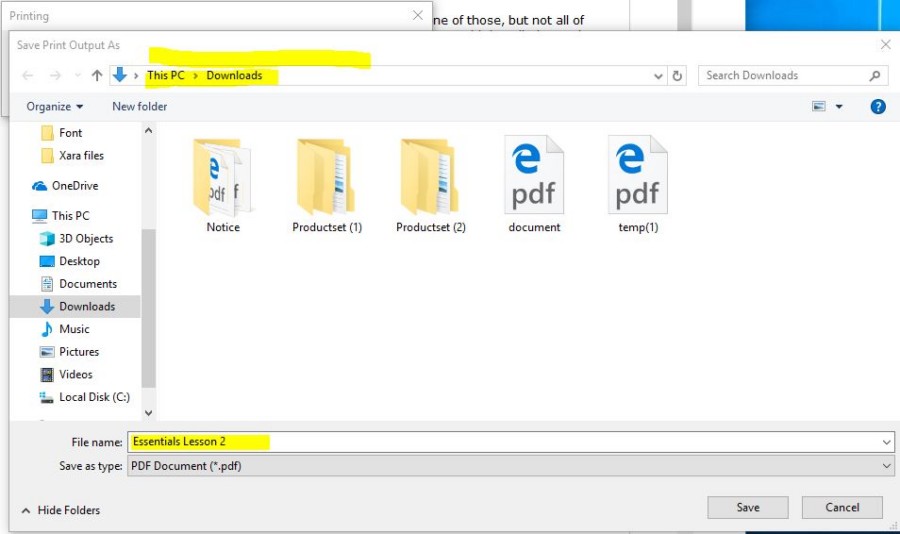
Above, you can see that I am saving this in my Downloads folder, and I am naming it "Essentials Lesson 2." As said, you can use this procedure to save emails as PDFs in Windows 10 from any email client.
Tip: If you are using Windows 10 Mail app, you can backup or save email messages on your PC (without converting them to PDF).
Kirsten S.
One way to learn digitizing is to look at pre-digitized designs and learn from them. In an early lesson of "Let's Learn StitchArtist Together" we discussed briefly the limitations of thread, and how embroidery digitizing is not the same as drawing something for print. Here's a free design for you to look at:
On the House Guitar:
The Rockin' in the USA Guitar design is a great example of how we sometimes create illusions with stitches. The scale of the design doesn't allow the stars to be stitched in satin stitches, so the illusion of stars has been created with connected run stitches. The path of the stitches keeps the needle in the fabric so no trimming is needed. The efficiency of the path of the stitches in the stars is a hallmark of well-planned digitizing.