


Hi Dayna, I checked with Dime Inspirations on this, and they suggested this:
Do you have the "Convert to Outline" checked?
If it is not checked please check it and try again.
12/18/23 11:07 am MST
Please Login to comment on this post.


For those using Embroidery Tool Shed software by Dime Inspriations, this is a place to ask questions, find answers, share experiences, or show off your creations. To post to the gallery, email your picture to [email protected].
To sign up for free emailed lessons on Embroidery Tool Shed, please visit the Let's Learn Embroidery Tool Shed page.

Hi Dayna, I checked with Dime Inspirations on this, and they suggested this:
Do you have the "Convert to Outline" checked?
If it is not checked please check it and try again.

I created a design of text and one symbol that is only 2 colors, however it's saying I have 4 stops. How can I consolidate the stops to only happen when the color changes?
Hi Jill, can you provide a screenshot of your objects pane? I think possibly you have four objects, and if you combine them down to two objects, you'll be able to get just two color stops. To do that in Tool Shed, I think you'll probably need to start over.
Hi! Here's a Software Success video with Ashley Jones. The topic is Freestanding Lace!
https://www.embroidery.com/event?eventID=2179&even...

Hi I have tried to resize an item and my tool shed software stopped regenerating stitches even though the box is selected. It always used to do this but now the function doesn't work. I recently updated my software could this be the issue?
Hi Sara, while one wouldn't expect an update to cause issues, it is indeed a possibility. If you haven't fully restarted your computer since the update, I suggest you try that first, then contact Inspirations support if it doesn't help:
https://inspiredbydime.com/pages/help-center
1-855-663-3353
Hi, I would like to change the background color in Embroidery Tool Shed to match my fabric color, can I do that?
Hi Faith, no. While we can change the grid color in the General Options window in the Tools Menu, there's no way to change the background color.
****Edited**** Yes, actually you can change the background color. Look in the lower right hand corner of the window. There's an icon that looks like a TV. If you click that, you can change the workspace background color.
Hi Kirsten, do you know why my background color is black? Whenever I see tutorials, the background is always white.
Hi Faith; perhaps you have Dark mode enabled in Windows?
It's just the work area. It starts out grey, but as soon as I start a project, or move a design onto the work area, the background turns black.
Faith -- I was able to get help with this, and here it is: When you have a design opened in Tool Shed, look in the lower right corner, and there is a TV icon. THAT is where you set your background color!
Faith, you're sure welcome. Have a great week.
Hello.
I have only just started to use this software. Can you please tell me how to print the design to the actual size when stitched out, when I print at 100% it still prints very small and not to scale. I'm sure its pretty obvious.. but not to me :)
Thank you !
Hi Denise.
Here's a tutorial on printing from Tool Shed.
https://www.embroidery.com/faq-printing-templates-tool-shedWhen you merge designs in Embrilliance Essentials and save as a stitch file, you are telling the software to make two designs i
Thank you for replying.
My issue is when I go to print preview my design is not there, just a blank frame although I can view it and mirror image on the program, Thank you.
Hi Denise,
In the Print pop-up box, double check your settings. Make sure you have "actual size" and "stitches" selected.

Hi Denise,
Thanks for clarifying. That's unusual. I've been trying to get what you're describing to happen for me. Nothing I do seems to replicate what you've stated.
Let me repeat what you are seeing. You open your design in Tool Shed, then you go to the upper menu in the upper left corner and choose file, and then from the dropdown list that appears, you choose Print Preview, and what you see is nothing. If you print anyway, it prints small and not to scale?
Are you using the steps in my previous message, exactly? Or do you have another way of reaching the print preview window? Which embroidery format is the design that you are printing? I wonder if you've got two tabs open, and one is blank and you're accidentally switching to the blank tab before printing? Perhaps you have sized the design before printing?
My only concrete suggestion at the moment is to uninstall and reinstall Tool Shed and try it again.
I am in the process of merging my machine embroidery files to my Embrilliance Essentials. My ultimate goal is have everything organized and easy to access. The problem I am running into. When creating a design, when I click "merge stitch file" and the design has been selected, I cannot move the object around. Before I started merging files to the embrilliance program, I could easily move things around by clicking and dragging. what have I done wrong????
Hi Roselyn,
When you merge designs in Embrilliance Essentials and save as a stitch file, you are telling the software to make two designs into one. That's why you can't move them around after merging and saving.
Merge is not for organzing or for bringing designs into the program -- the designs can stay in the folders you have them saved. In order to open your files in the software, you do use the Open or Merge features, but these are for use when you want to manipulate or alter your designs. Embrilliance Essentials is not a design organization software.
For design storage and easy access, I suggest you organize your design folders.
Here are a couple of videos guidance on how to organize your designs:
Here's a similar system from Sue at OML:
I hope these are helpful to you.
I want to invite everyone here to today's live Software Success broadcast. It's all about all the things you can do with Embroidery Tool Shed! http://www.embroidery.com/event?EventID=2179&reid=...
It will also be available later as a replay at the same address.
New to My Tool Shed. I have My Quilt Embellisher and My Quilt Block. My Question is how do you move between them? I'm in MQE and want to open and use MQB. Anyone know how to do this? I have MQE as my default and that was the only way to open it, that I know of.
Hello Lu, To switch between your programs:
Look on lower right hand corner you’ll see a shopping basket (for purchasing) & file/program. Click on file & find the program you want (should have green check mark for all you have purchased/available). Click on the three dots to the right & click on ‘default’. You have to do this every time you change programs.Does Embroidery Tool Shed have a knockdown stitch? If so, how do I apply it?
Hello Peggy,
Thanks for the question. Tool Shed does not have a knockdown. The only way to use a similar thing in Tool Shed without buying more software would be to get some pre-digitized shapes that you could copy your other designs on top of. There are some folks offering pre-digitized "knockdown" shapes. You could search for knockdown pile-down or nap-down or similar terms.
The real, original knockdown feature was created by Embrilliance and it is in the Embrilliance Enthusiast software, which isn't a Tool Shed product, but would open in a separate window if you got it.
I am having difficulty loading a file from My Quilt Emblisher to my Babylock Spirit. The file shows in my flash drive but will not load to the embroidery machine. Any suggestions
Hello Paula,
I have a few ideas for you to look at:
If the format in My Quilt Embellisher is not PES, most likely that's why your Babylock Spirit isn't seeing it. So check that it is saved on your flash drive in an embroidery format.
Second, check the size of the embroidery design. If the design is larger than your Spirit's sewing field, it won't be read by the machine.
I hope that one of those is the issue, and that you're able to resolve it soon. Best wishes!
Join us on Thursday for a live online discussion & demonstration about continuous embroidery:
https://www.embroidery.com/event.ec?eventID=2159&e...
I've noticed that these discussions usually wind up with a few Tool Shed tips in them!
Can you tell me what files can be opened by Tool Shed? I'm wanting to open an .ai file (created by MS Illustrator) and then save it as a .pes file..
hi! Thanks for the question. Tool Shed is only able to open embroidery files. In fact there are not many programs that attempt to convert images to embroidery in an automatic digitizing manner.
It's most effective to have a person do the digitizing with digitizing software like StitchArtist or Hatch or Perfect Embroidery Pro.
am I able to add outline to pre digitized designs
Hi Jacquelyn,
Thanks for the question. With Tool Shed, no, you cannot. If you get Tool Shed you can make other modifications like mirror, rotate, change colors and size, and merge, and you can print a production sheet. If you had two designs to combine that would effectively create an outline for the first design, then yes you can do that with Tool Shed, but only if both designs are pre digitized.
If you want to create your own design elements, you would need a different software such as Perfect Embroidery Pro, or Patch & Applique maker, depending on the kind of outline you are trying to make.
I am new to the embroidery platform. I was gifted an older Babylock esante ese2 that has a card reader. Will this work with my machine? Thank you
Hi Laura,
You'll need a card writer to make this software work with your Ese2; If you don't have one, I suggest you look second-hand (ebay, etsy, etc) or check out the Vikant Ultimate Box. It has a box that can write cards for Ese2.
With this Embroidery Tool Shed software, you can use its built in designs, or other designs from the Internet (sites such as Embroidery.com), make edits, print production sheets, save the edited designs to your format, then use your card writer box (it plugs into your computer) to write that design to your card. Then you'll be able to take the card to your Esante Ese2, insert it, read it, and use the design.
Thank you, Kirsten, for responding to my question. I do have Amazing Designs Little Max conversion box which I am attempting to learn. I will try to us this to transfer the designs that I downloaded from the workshop.
Oh, good! This should work well then.
Here's a video that should help with Little Max:
Unfortunately, it's not clear enough to read the words on the buttons onscreen, but it should help you since you can see the placement of the buttons.
When you use Tool Shed, I suggest you save to the .pes format in Tool Shed. There are many PES format versions. Don't let that stop you! The lowest numbered version will work; some of the higher ones may as well. Each of the versions have more color capabilities than the last, but they all will deliver a stitchable design.
Thank you, again, Kristen. I will watch the video and try my hand at saving and downloading to the card reader.
Have a great day!
Best of luck, Laura! You have a good day, too.
A question on Patch And Appliqué Maker from DIME. (I hope this is the correct place to post this.
I am using the Cutter Tool to create templates to trace the appliqué shapes so I can precut the fabric and not have to cut it in the hoop. Each template, no matter how small, is put into a PDF file in the very center of a single page. That’s a lot of wasted paper. Is there a way to put more than one template on a page using this software, or do I have to use Copy/Paste in Adobe to manually bring them all onto a single page?
Thank you!
Hi Leslie, I hope this helps: I remembered that a few weeks ago Ashley and Joanne showed us how to use the cutting tools in Patch/Applique Maker, and Ashley put a whole bunch of little pieces on a page. Here's the link to the video starting at that point:
I think doing multiples of each shape is the only way to use more of the paper for each shape; but I may be (I hope) mistaken.
Here area few other places to ask this question, where you might find more experienced users of Patch & Applique Software:
Dime Software Facebook Group https://www.facebook.com/groups/dimesoftware
Inspirations Software support email: heretohelp.inspirationsupport.co
Thank you for the kind reply. I have seen that demonstrated, but I don’t need multiples of the pieces. I will try working thru Adobe.
You're welcome Leslie. I'll keep my ear to the ground on this feature, and update you if I learn anything more useful. I think your Adobe idea is a good work-around.
Is there a default setting for stitch length in TS or is it determined by the design when opened? Is there a way to change starting stitch in TS? My embroidery is mainly quilting, and I want continuous designs without many stop & starts. Wonder why this isn't a tackdown & cut option in embroidery mode of machines. Wpuld be especially helpful to quilting. ? Thanks.
Hi Carolyn, Here's what Inspirations Software suppor told me about Tool Shed:
"The default stitch length in the PEP is 3.0 mm. Using the "SHAPE" icon you can change the begining and end by adjusting the green and red dots on the section of the design."
Hi Carolyn,
I agree a tackdown & cut would be really helpful. I suppose when manufacturers realize that we're using embroidery machines for quilting, they *might* decide to add that feature.
I don't know the answers to your TS questions. I think that if you go to the properties box, you can see the stitch length. I will check with the software company to find out. I don't believe there's a way to change the starting stitch with TS -- for that you'd likely need Perfect Embroidery Pro (within the same brand of software). I'll get back to you with any answers I find.
I was wondering how I get a design from my computer to ETS to change thread color or other stuff to it, then taking it to the USB stick to take to my computer. thank you
Hi Mary,
If you have a design on your computer and want to open it in ETS, here is one way:
Open ETS
Then choose "open a design" from the menu:
Then you will get a dialogue box, where you can find the location of your embroidery design on your computer. In this example, I'm navigating to "downloads" because that is where I have my design:
Then find the design and select and click "open"
Your design opens.
Click on a color in the color sequence, then click on the color chip on the bottom, and you'll be prompted to change the color.
Then, to save it to your USB, first insert a USB, then just go to the save icon at the top, and click it:
You'll be prompted to save your file. In the top of the save window, navigate to your USB:
Then type a name for your file if you wish, and choose "save". The design will be saved to your USB.
Hi Kirsten. I have my designs in Tool Shed. I don't have a usb on my brother machine so I have to connect from pc to sewing machine. I can't seem to do it. Help thank you.
Hi Lillian,
Thanks for your question, Let's see what we can do here.
What's your brother machine model?
Since it doesn't have USB , does it have some other storage media like an embroidery card? Or is there a cable that you generally use to connect the machine to your computer?
If I have designs on my computer and want to look at them before I take them to my sewing machine Maybe to switch thread colors or something. how do I get them to Embroidery tool shed and then to my USB stick? thank you
Hi Mary,
First student open embroidery tool shed, then use the file open option to navigate to the design you want open once you have it opened in your software you can make any changes you like and then save it out in your embroidery format onto a USB stick.
Hello, I downloaded Embroidery Tool Shed even though I already have Perfect Embroidery Pro. I read above that the Embroidery Tool Shed should be checked or you could be in trial moe. Here is a screenprint:  Is it loaded properly?
Thank you. I thought I read where Embroidery Too Shed needed to be checked. So, I wasn't sure if I loaded correctly.
I do see in their videos that Tool Shed is usually checked. Are you able to use the features of Tool Shed when you open the software?
Here's a video on integrating your environment into Tool Shed when you already have Perfect Embroidery Pro. I hope it helps.
I have tried to no avail, since I purchased my Microsoft Surface Go in January 2021, in fact, to install Embroidery Tool Shed. The total reason for my purchase. Can someone help?
Hi Charlene,
yes, I'd be glad to help you. First, where is the process getting stuck for you? You can reply here or to [email protected]
The program said to update which I did and the purchases were listed like they should. I have the shed and viewer. But when I close the program and go back into it the purchase are not there anymore. What pray tell am I doing wrong? Thanks
Hi Debbie,
I'm not sure what you are seeing in place of the purchases, but there are three choices as far as I can tell.
Here's a picture from my screen:
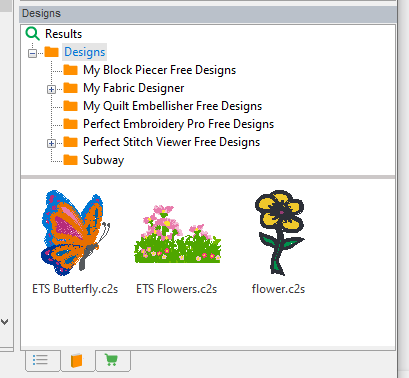
Right on the bottom are three tabs. If you click the tab with the green shopping cart, you should see the "purchases" bar. If you have clicked, the book icon, you'll see folders and design choices. If you click the bulleted list icon, you'll see the stitching sequence for the design you have opened, if any.
Hi, I have the free download of Tool Shed (for maybe about 8 months). I have been able to save files toput them on a USB so I can use them in my machine. The other day I combined designs and cannot save them anymore. The disk button shortcut and the "file" sav/save as buttons are all unhighlighted (they are not working). I think the program recently update and this happened afterwards. Are we no longer permitted to save? I hate to try unistalling and reinstalling because I have designs I worked a long time on that I don't want to lose. Any way to get these tosave again? Thank you.
Hi Debbie,
Thanks for clarifying. I had hoped perhaps the software was simply being "smart" enough to stop you from saving a design larger than your PE770 could use.
The only thing I know of in Tool Shed that would stop you from saving, is if you are demo-ing one of the paid programs listed on the far right pane. If you are, nothing will allow you to save while in Demo. If that's the case, you can disable the demo by restarting the program. Then, so long as you are able to do what you want to without choosing the "try" option on one of the paid programs listed on the right, you will be able to save your work again.
Thank you, but I am not in any demo. It is the full free program. I am afraid it will entail uninstall/re-install to fix it. My hesitation with that is the amount of work I put into creating the 2 designs I was trying to save! If you know of any other fix, I'd appreciate it. Otherwise, thanks for trying to help.
Debbie,
I do understand that you are using the full free Embroidery Tool Shed program.
However, it is also true that you can be in the full Tool Shed promo and also enter a demo of some of the non-paid items. To check if this is the case, go to the lower right area of your window, and click the green shopping cart tab on the bottom (shown below).
You should have Embroidery Tool Shed showing first, checked. That means you are using the full free program. Now also scroll through the list below Embroidery Tool Shed. Look to see if there is a timer next to any of the other listed programs. Above, you see I have a timer icon next to Perfect Embroidery Pro.
If you have a timer listed next to one of these programs, that means you have also activated a trial of that program. When you have the timer on (a trial activated), you cannot save. To turn the timer off, you will need to re-start the program.
You will not need to uninstall and reinstall, but you will use your work.
I hope this is helpful to you. If not, here's a number you can call for help with Tool Shed: 888-739-0555
Hi Debbie,
My guess is that when you merged designs, your new design is now too big for your machine to recognize, and that's why it won't save.
I recommend saving a smaller design to verify.
Hi Kirsten. The problem is not with my embroidery machine. The problem is that I cannot save it to my computer to get it to my machine. I was able to before. I can't even take the free designs in the software and save them to get them to my machine. I was able to do so before and the tutorials indicate that you can.
Dayna O.
Hello! I am the new owner of a Janome MC350e and I have just downloaded Tool Shed. My design is uploaded, but when trying to adjust the trim defaults between objects in my logo; in >Tools >General Options >Machine >Activate trim if stitch is longer than (from 20.0mm to 5.0mm) and Split up jumps longer than (from8.0 to 5.0), it doesn't save it. My logo has 5 jumps (which aren't trimmed, but I would like them to be) and 2 long stitches (both of which are around 8mm each, that I would like to be trimmed, too). Is this possible and if so, how do I do it? Thank you so much. :) Dayna.