1:
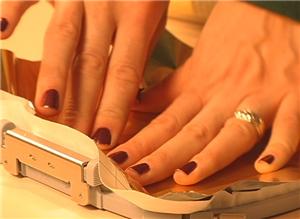
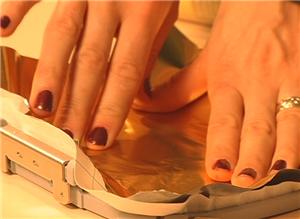
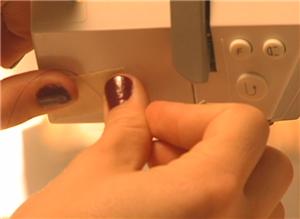
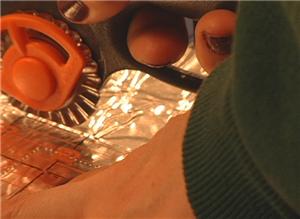
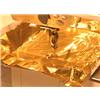
First, you need an adhesive stabilizer and some thin metal. In this example, a lightweight embossing metal, purchased in a craft store is being used.

2:
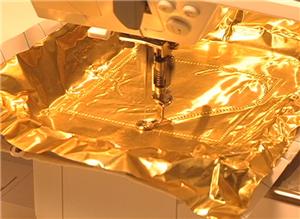
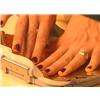
Hoop the stabilizer and press the metal piece inside the hoop, on the stabilizer.
3:
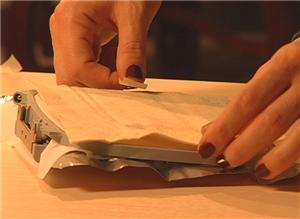
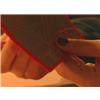
Before you put the hoop on the machine, attach a piece of felt or fleece to the underside of the hoop. This will protect your machine from the pierced metal.
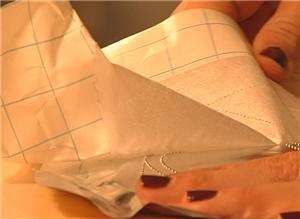
4:
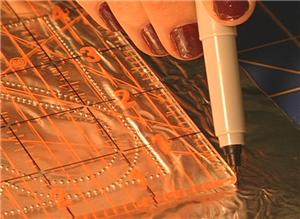
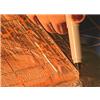
Embroidery thread would quickly shred and break, making its way through punched metal, so for this project, you will punch without thread. To stitch without thread, disable the thread sensor on your machine, or fool your machine into thinking it's stitching with thread: put in a full bobbin, install the stitching thread as usual, but tape the thread to the machine just before it passes through the needle.
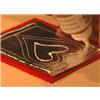
5:
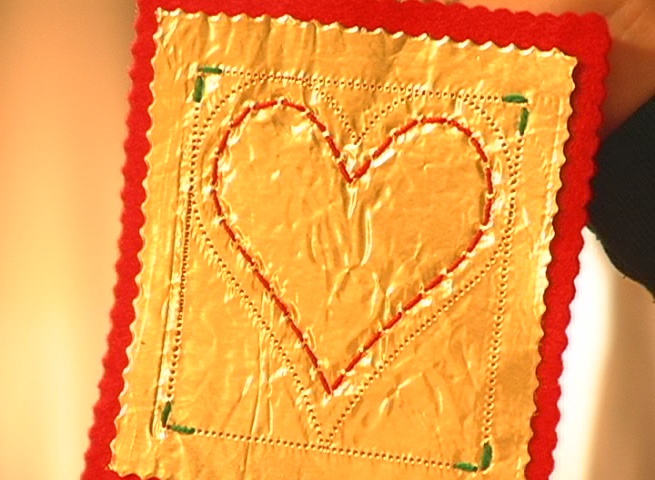
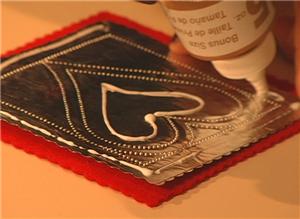
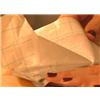
Embroidery designs that work best for a project like this are simple shapes digitized with a running stitch. Designs labeled for quilting, redwork, or reverse applique often fit the bill. The two designs shown here are "Smaller Heart for Tucked Reverse Applique" (jm20), and "Smaller Square for Tucked Reverse Applique" (jm26) for a decorative border.
6:
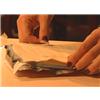
When the design is punched, remove the felt and stabilizer. Take care in handling the punched metal. The thicker the metal, the sharper the underside edges will be.
7:
To make this punched metal sheet into an ornament, mark your cut lines on the back of the foil a half an inch away from the square border lines, for a 4 1/2 inch square.
8:
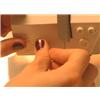
Use decorative shears or cutting blades to cut along the lines.
9:
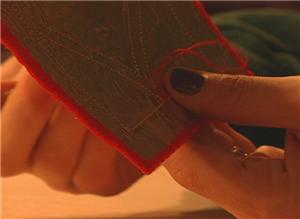
Cut a piece of felt just half an inch larger than the cut tin. For this ornament, that will be a five inch square. Glue the felt to the back side of the tin: this looks pretty, and also keeps the sharp side of the ornament covered.
10:
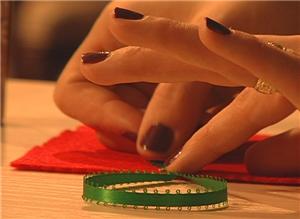
Add a little extra color to the tin punching by lacing crochet thread or one ounce yarn through some of the punched holes. Push the needle through holes from the top in order to guide your stitches up from the underside.
11:
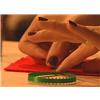
Attach a ribbon to the back side, for hanging the ornament.
12:
If you enjoyed this project, you'll find more on punching metal, and more ways to expand your embroidery horizons in the book Machine Embroidery Wild & Wacky, available on Embroidery.com.


 Smaller Heart for Tucked Reverse Applique
 Smaller Square for Tucked Reverse Applique
 Tucked Reverse Applique Design Pack
 Video Showcase: Series 3
 Mylar & Glass Ball Ornament Project
 Freestanding Lace Christmas Ornaments Project
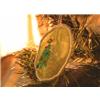 Organza Entrapment! Christmas Ornaments Project
 Embroidered Christmas Tree Garland
 Felt Ornaments
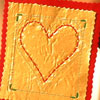 Tin Punch Ornaments Video