


 Between Friends Live* With Eileen
 Madeira PolyNeon No. 40 - 400m Spool / 1986 Rose
 Hemingworth 700m 40 wt. Metallic Thread / Silver 9012
 Madeira PolyNeon No. 40 - 400m Spool / 1831 Orchid
 GlitterFlex Ultra - Lavender


Thanks, Anne!
12/13/22 10:40 am MST
Please Login to comment on this post.
I decided to make a Christmas sweatshirt for the next weekend's virtual event, and thanks to #onthehouse, I had the perfect design: Holiday Tee
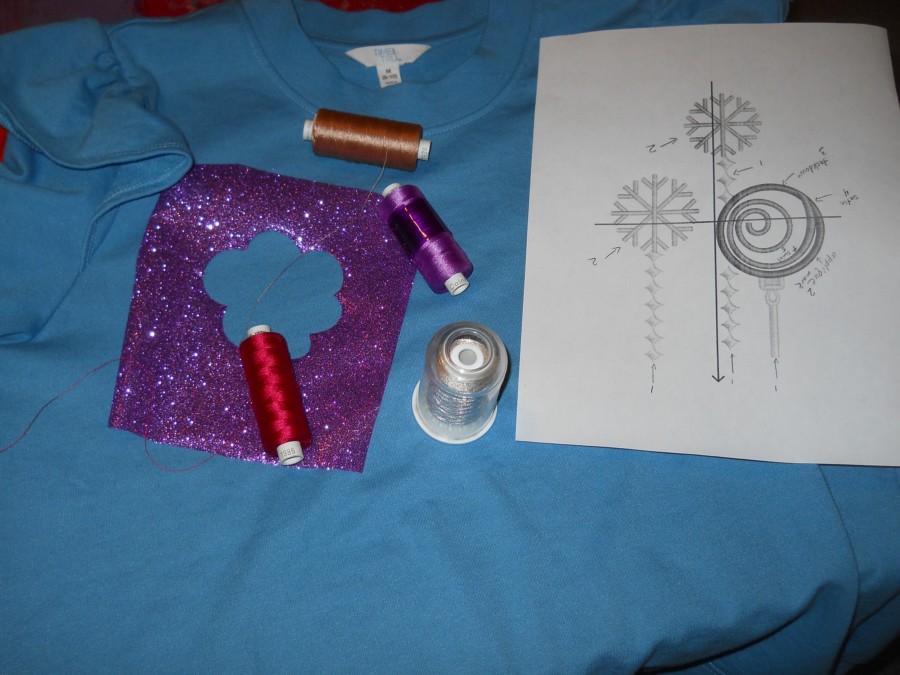
I started by choosing my applique fabric and thread colors. Hang onto your hats, because I mixed brands. I used GlitterFlex Ultra for the applique fabric. I'm not 100% sure which color I used, since I don't have the label on it any more, but I think it is GlitterFlex Ultra Lavender, Madeira 1928 (natual suede), Hemingworth 9012 (metallic silver), and Madeira 1831 (orchid), Madeira 1986 (rose)
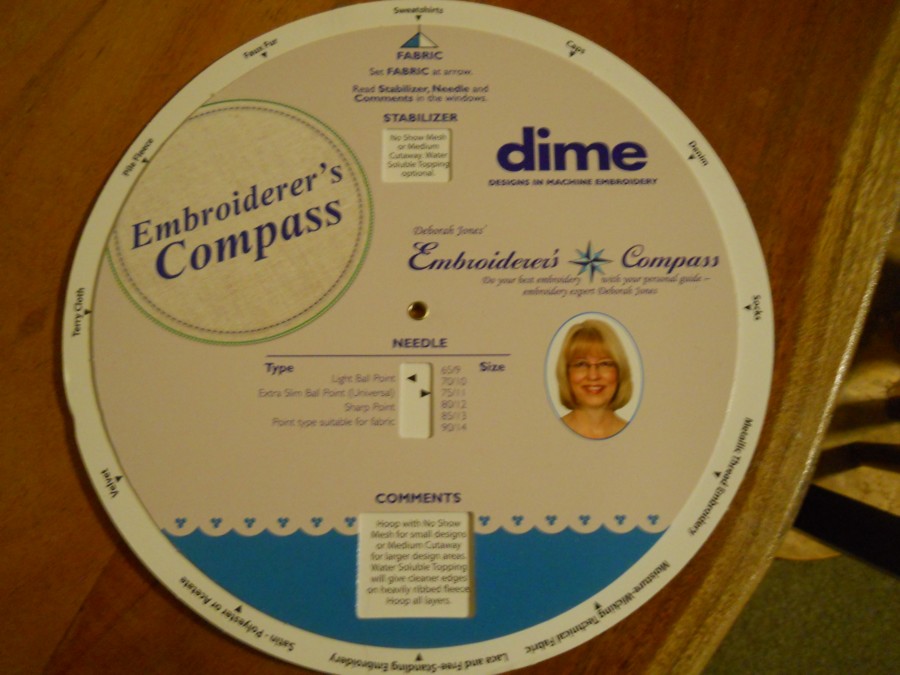
Next, I used my Embroiderer's Compass to help me choose a medium weight cutaway stabilizer and 75/11 sharp needle. As a general rule, we say "if you wear it, don't tear it" meaning that we use a cut away on wearable items, rather than a tear away stabilizer. It just provides better support through the live of the garment. Also as a general rule, you want to use a ball point for knits. On this thick knit, I decided the light ball point of a "sharp" embroidery needle was good enough. So I didn't really need the compass for this, but I like using it. Every time I do, I just marvel at the way it's put together. Thinking of organzing all of the data on a wheel like this so that it all matches the appropriate windows makes me so glad Deborah Jones had the head for it!
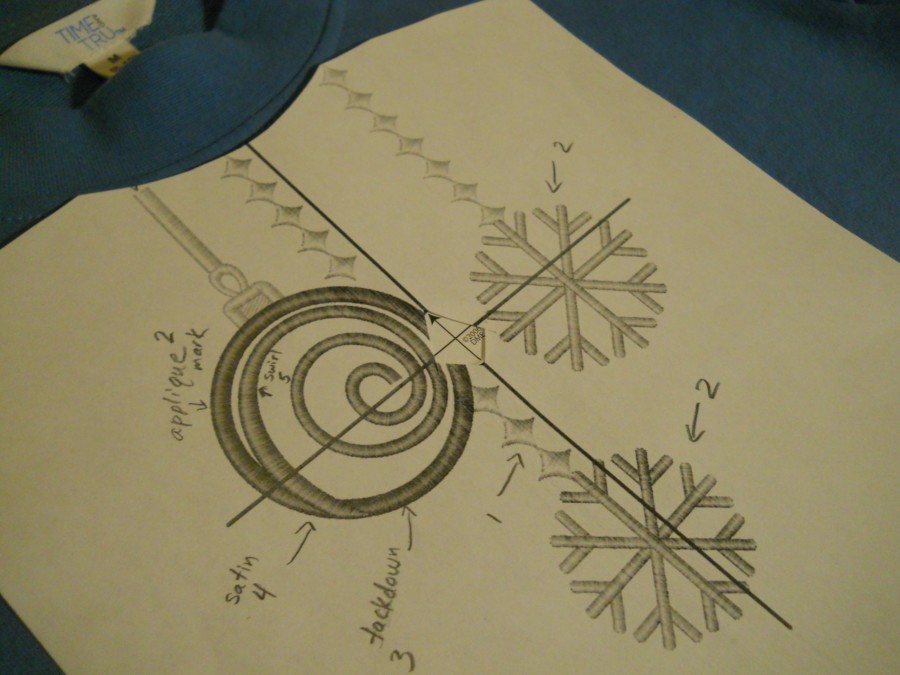
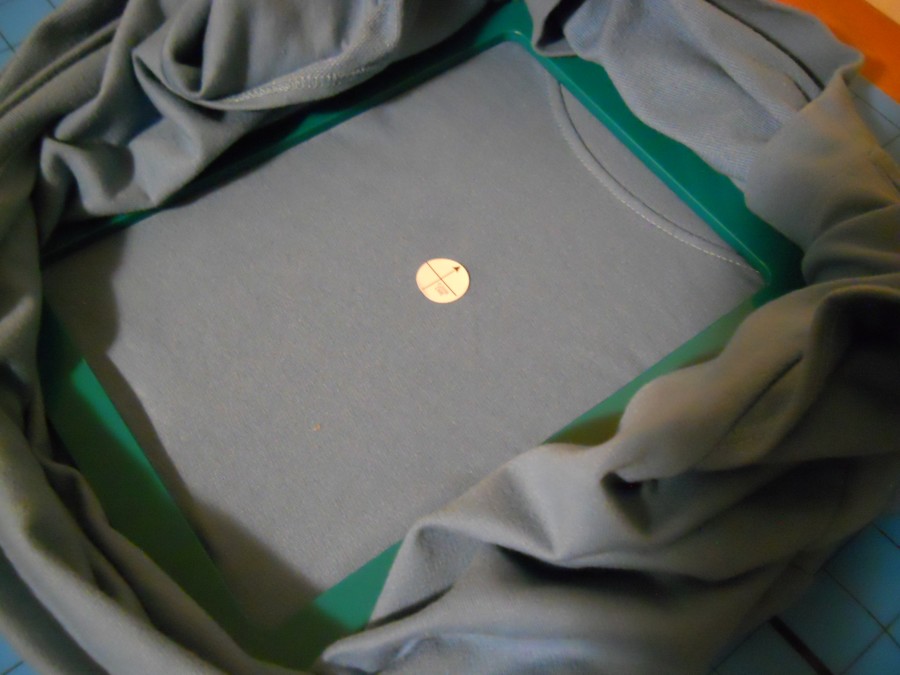
I used my printed copy of the full-size design (crosshairs included) to mark my placement. I cut a hole at the center to help me to align my target sticker.
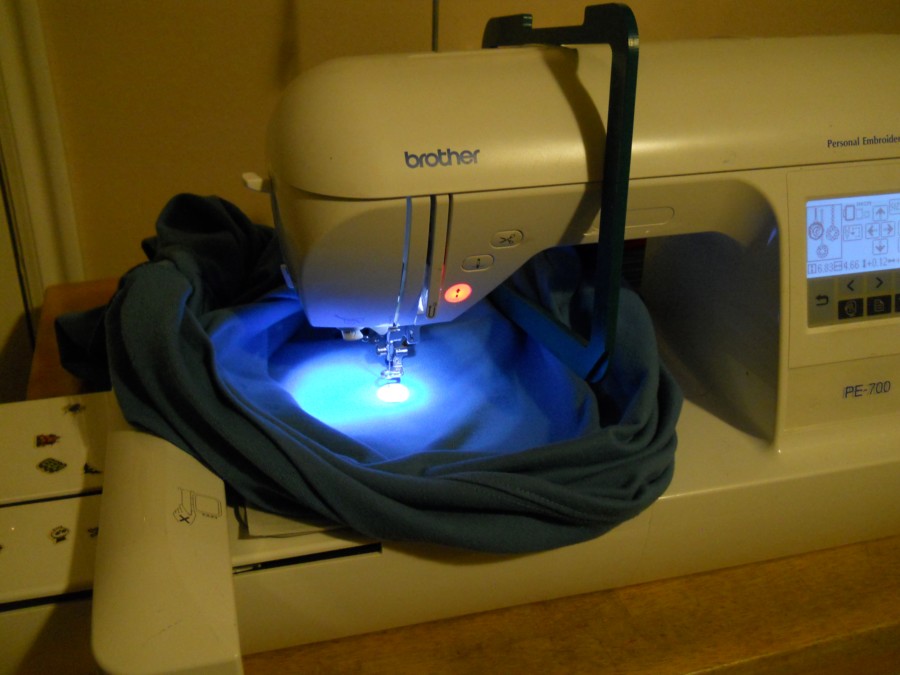
Next, the hooping. I used a Monster Snap Hoop and a Hoop Mat to hold it in place as I worked. It's my first time using the Hoop Mat, and I will say it definitely beats the thumb screw hoop holders and the carpet, and the flat table -- all those things I have used in the past. I think I'll put a Totally Tubular Hooping Station on my wishlist, since that would have improved my ease and accuracy. As it was, I turned the sleeves inside out and pulled the back of the shirt forward to hoop on a flat surface. It's awkward, but it does work.
As it was, once I got to the machine, I needed to make an adjustment (putting the adhesive rulers on my Monster hoop before beginning would have helped me to avoid that). I was glad that it was a Snap hoop. Making this kind of adjustment at the machine with a standard hoop is not something I recommend to anyone. It has been a while since I stitched*, but that difficulty is one that I clearly remember!
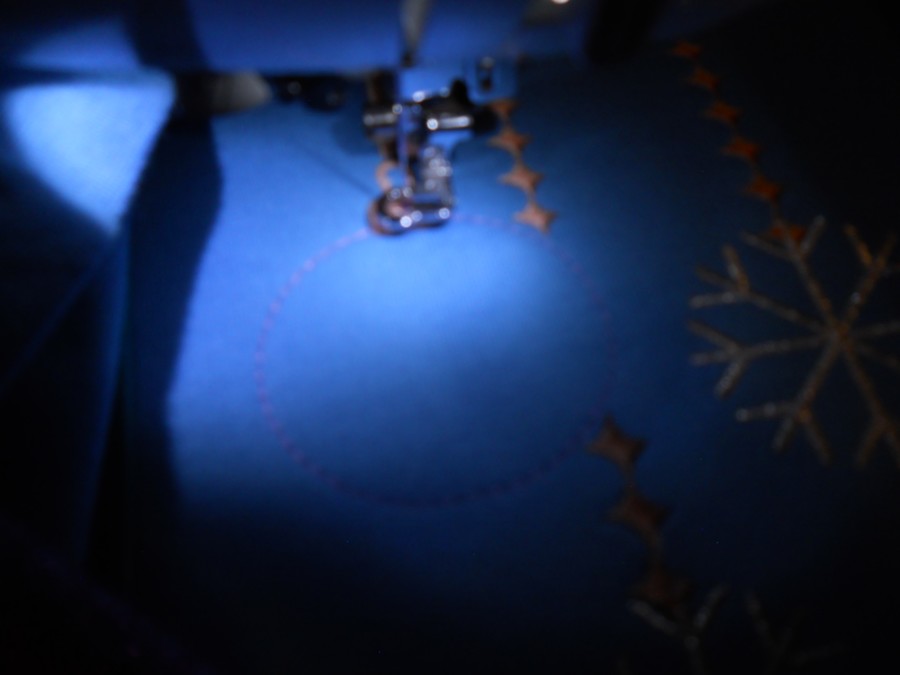
On this design, the ornament hangers stitch first, so I began with the gold color. Next came the silver, all is going well. About halfway through the bottom snowflake, I noticed I had accidentally obstructed the hoop's movements by not moving a stack of books from behind the machine (rookie mistake -- like I said, I hadn't stitched in a while*). This had the effect of raising the design's registration by about 1/4" inch. I decided I was okay with a vaguely egg shaped snowflake ornament on the bottom, and a slightly raised one on the right, so I didn't remove any stitches. But I intended to re-adjust the registration before stitching the appliqued ball ornament.
I do have a bit of experience with fixing my own mistakes though. So before fixing the registration, I used this mistake to my advantage, and re-stitched the top of the leftmost ornament hanger, which doesn't go quite as far to the top of the neckline as I'd have liked (something I forgot to ammend in software before beginning). Now that my design registration was "off", I could change that easily. Nothing like editing on the fly, in a very physical way, is there?
So then I ended the design, readjusted the starting point and started over, using the skip color & skip stitches feature to move to the ornament ball part of the design. Perfect. I love it when I save a project like that.
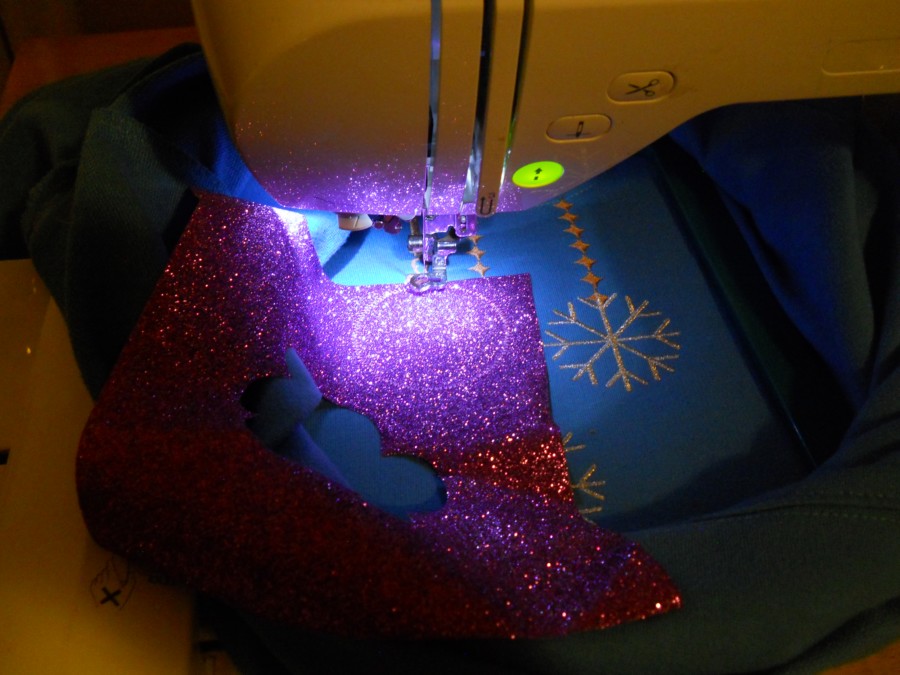
First comes the applique mark, which tells me where to place the GlitterFlex Ultra.
GlitterFlex Ultra is strong, but after being punctured by the machine, will tear away easily, so I decided not to pre-cut it. I just laid the corner over the applique mark, making sure the whole circle was covered. Then I stitched the tack down and the satin stitch. I could have removed the excess GlitterFlex Ultra after the tackdown if I'd decided to do that. After that, the design was finished, so I removed the hoop from the machine and gently tore away the GlitterFlex Ultra. I will then set it by pressing with an iron to fuse the GlitterFlex Ultra to the fabric.
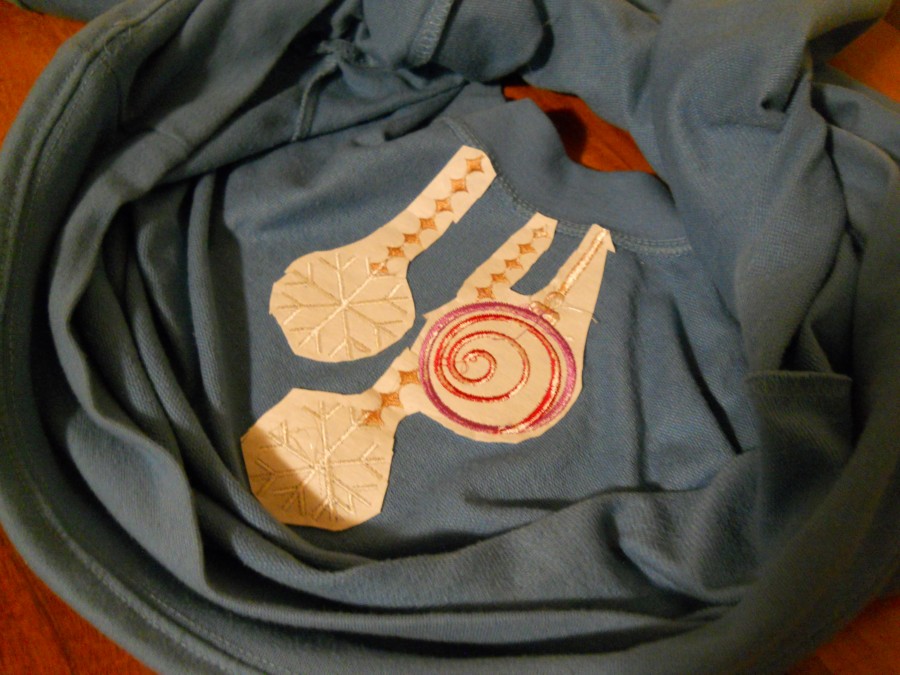
And I turned it over and cut away the excess stabilizer. I didn't think of using my duckbilled applique scissors for this, but it would have been a good idea.
Now here's my Christmas tee! I'm going to wear it to Custom Quilting with your Embroidery Machine on December 9! Now that I've shown you how, you'll make one too, right? Join me in solidarity this Friday, even if you make a few mistakes. It's okay, we're all learning together.
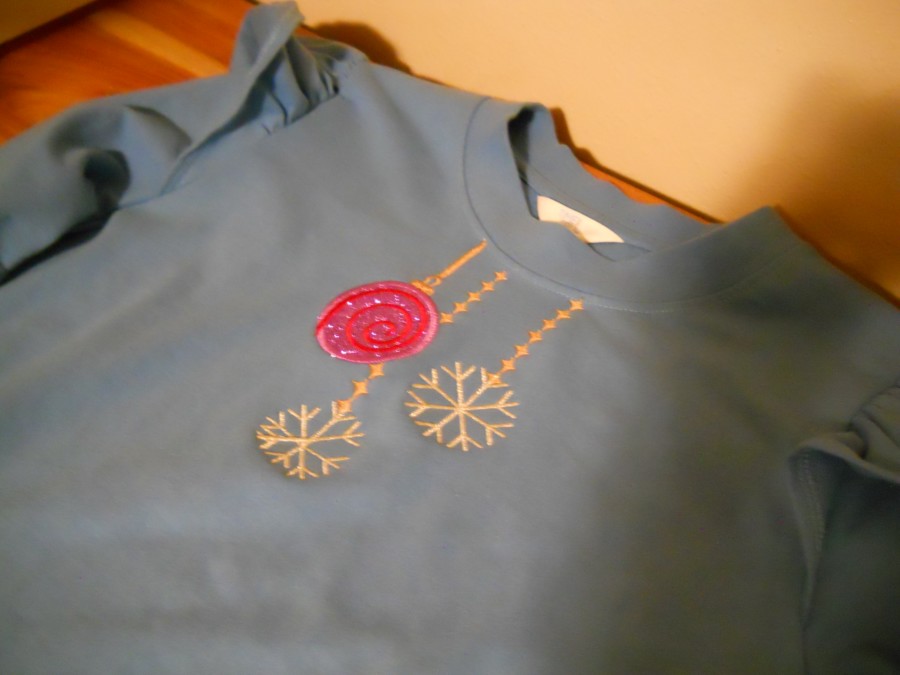
It's much more blue in real life. The lighting in my stitching area and my photography skills just weren't up to the task.
* I had thought my PE-700 had given up the ghost, since the power cord wouldn't stay in, and also since the last time I wrote designs onto a card, the machine wouldn't read designs off of the card any more -- even though I tried different cards. But then I had a lightbulb moment. This is an elderly embroidery machine, and Brother has been great to support the software for over a decade, but maybe Windows 11 was the last straw. I decided to try using my older computer (not Windows 11) to write the design onto my card. Elderly Windows XP to the rescue. Et voila; I'm in business! If I can do something about that power cord... so then I found that by stabilizing the cord on my sewing table in a different way, I could overcome that issue until I can replace the cord. Yes indeed, I'm in business.
Anne M. M.
love it