Software Success: More about the new Edge to Edge Plugin
Watch:
Making Embroidered Fringe Earrings
Making Embroidered Fringe Earrings
Begin with two hooped laters of water soluble stabilizer. To conserve stabilizer, you can keep it on the roll during stitching. You can fit many earrings in the hoop; direction doesn't matter, since we'll be removing them all from the stabilizer.
Trim fringe while still in the hoop: Insert tip of scissors into the back of the fringe satin stitch.
Pull the bobbin thread, and trim it away
Cut out the finished earrings and rinse in very hot water (not too hot to touch)
Rinse in running water.
Lay it to dry on a towel.
It will be stiff, and that's good.
Clean up the fringe, adjust and trim any stray threads.
Add the kidney shaped earring and insert through the top loop. Handle with care.
Use a toothpick to comb out the fringe.
You can press the earrings, if you like.
Does your fringe ever come out clumpy? In this video, Eileen shows how to ensure that your freestanding lace fringe looks fantastic.
Trim before removing from the hoop.
Eileen suggests a blunt tip scissor for snipping the back threads of the fringe -- they don't snag on the thread like sharp tip scissors do.
Gently tug on the cut bobbin thread to remove it and to identify any un-snipped areas.
From the front, brush the fringe loose.
Dissolve stabilizer in very warm water.
This is the point when the fringe clumps.
Get a toothbrush or something similar and brush the threads.
If it's difficult to brush, dunk it back in the water to further remove stabilizer.
Brush, and when it looks good, lay it on a towel to dry.


 Making Embroidered Swivel Earrings
 Finishing an Embroidered Bracelet
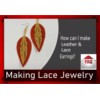 Making Feather Earrings with Faux Leather
 Lace Jewelry Hardware Kit: What Comes in it?
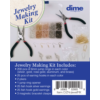 Lace Jewelry Kit
 Lace Jewelry