What's New Wednesday April 24th
Watch: 

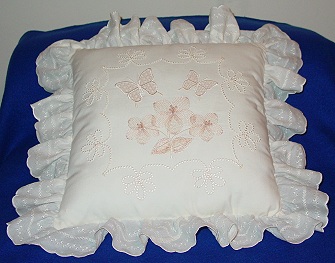
Heirloom Pillow
This project is dedicated to all those that have a wing needle in your drawer and couldn't find the "right" project to use it on. The finished pillow makes a perfect wedding or anniversary gift. This extra special project will become a treasured family heirloom.
1:
You will need the following supplies: A wing needle #100/16, two 15" squares of muslin or batiste, a 4" x 120" strip of muslin (for the ruffle), 2" wide adding machine tape, spray starch or spray stabilizer, cream colored embroidery thread, a vanishing ink fabric marker, and Fray Check. I also recommend Philip Pepper's book, "The Artistic Creations of Philip Pepper" for reference.
2:
I wanted to make a special gift, one used an embroidered design along with the wing needle. I created three designs, KK0083 (butterfly), KK0082 (candlewick bows) and KK001 (flowers) for this pillow. The rest is any combination of built in stitches along with using the wing needle.
3:
Begin with two 15” squares of muslin or batiste. It is recommended that you use a 100% cotton fabric with the wing needle. Poly fabrics spring back and therefore don't give the same look.
4:
Spray one of the 15” squares with fabric stabilizer or starch. Spray and iron a couple of times in order to stiffen the fabric.
5:
Rotate and reduce KK0083 butterfly to create a second version at a different angle and size.
6:
Using a printed production sheet of the actual design, place it appropriately, put a pen through the crosshair in the middle and mark it. Repeat this for each design you are using. I used the "Candlewick Bows" design to create a framed effect around the pillow top, and then placed the flowers and butterflies in the center.
7:
Following your placement markings, embroider the designs on the fabric that will become the top of the pillow.

8:
The ruffle is definitely time consuming. I really gave this much thought as I was leaning toward buying some nice lace for the ruffle. I knew this would take some time, and it does, but the results are worth it. For this project I used the built in stitches on my Pfaff 7570. If you are using a different machine, you may be able to use similar stitches to the ones I've used.
9:
I had a nice long piece of muslin (this was very cheap too) so I only needed to add one small section. If you need to piece I recommend doing a diagonal cut versus a straight as it will sew and look nicer. You want to end up with a piece 4" by 120".

10:
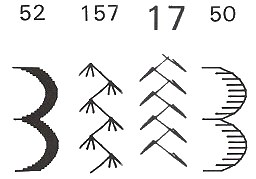
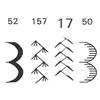
Take both ends of the ruffle and sew them together to make a circle. You are now ready to make your scallop. I used stitch #52 and a density of .30. This is where you use the 2" adding machine tape. I tore off a piece of tape about 24" long to begin with and slide it under my 4" ruffle. This gives it great stability and tears off like a dream. You continue this process until the whole thing has the scalloped edge. That was still the easy part. Make sure you tear off the paper. This is very easy!
11:
Then take this circle to the ironing board and turn it to the wrong side. Put just a few drops of Fray Check on and begin spreading it over the wrong side of the scallop. Do this until the entire scallop has Fray Check on it. Then drape it over a hanger to dry over night.
12:
Next is the time consuming job of cutting out the scallop. Use small scissors or applique scissors, and cut from the back side. This is very much worth the extra work.
13:
Before starting your wing stitches on the ruffle spray it well with the fabric stabilizer. After sewing a couple rows of stitches you can tell if you have enough spray or starch on the fabric as it will not pucker. Do not use a tear away stabilizer under these stitches; use only the starch or spray.
14:
Next using the scallop as a guide sew the next row of stitches (2nd) using #157, 3rd #17 and 4th #50. You now have a circle with a scallop and decorated with 3 rows of wing needle stitches.
15:
Fold this long circle in half, and then in half again. You want to be able to mark 4 places on your circle so it is easier to ruffle.
16:
Take out your wing needle now! In between your four marks you want to sew a double row of stitches with a long stitch and leave long tails that you can use for gathering. Each area will need to fit on top of your pillow.
17:
When you have gathered up the ruffle to where it lays nice on top of your 15" square, you are ready to put on the back of your pillow. Your ruffle right side should be next to your pillow top right side. You can pin or baste these pieces together leaving an approximate opening of about 6 inches in the middle.
18:
Turn the pillow to the right side through the six inch hole.
19:
Fill the pillow with batting, and hand stitch the hole closed.
20:
Now you just need to make another pillow to give away, because you want to keep this one for yourself!


 Pink Butterfly
 Candlewick Bows, larger
 Flowers with Radiating Petals
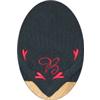 Mirroring an Embroidery Design File
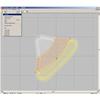 Rotating an Embroidery Design File
 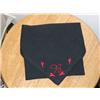 Placement Marking
 Printing Production Sheets